
The Bottom Line: Webflow’s native localization handles the front-end “plumbing” of subdirectories and hreflang, but its editor is a manual bottleneck for large collections: the most efficient way to scale is to export your CMS content translation as a CSV, process it through a specialized AI engine to protect your SEO metadata, and re-import the translated data.
Webflow’s built-in localization lets you create multilingual websites without code, but it has a serious blind spot when it comes to translating CMS content at scale.
If you are building a multilingual site on Webflow, you have probably already seen the native Localization feature in your project settings. It looks straightforward: add a locale, translate your pages, publish. And for static pages with a handful of sections, it genuinely works well.
The challenge shows up the moment your site has a significant CMS collection. Think 200 blog posts, 500 product pages, or a portfolio with dozens of case studies. At that point, Webflow’s native translation workflow becomes a manual slog that can take weeks.
This guide will walk you through how Webflow Localization actually works, where it shines, and the practical workaround that teams use to translate CMS-heavy sites in minutes instead of months.
What Webflow Localization covers
Webflow introduced native localization as a way to manage multilingual content directly inside the Designer and Editor. Before this feature existed, teams had to duplicate entire projects or use third-party tools like Weglot to layer translations on top of a single-language site.
Here is what the native system handles:
Static pages are the strongest part. You can select any page in the Designer, switch to a target locale, and override text, images, and layout elements. The original page acts as the “primary” locale, and each additional locale gets its own version. If you update the primary, Webflow flags the localized versions as potentially outdated so you know what needs a refresh.
CMS collections are supported too, but the workflow is different. Each CMS item gets a localized “variant” for every locale you have enabled. You open the item in the Editor, switch to the target locale, and manually translate each field. The fields inherit from the primary locale by default, so untranslated fields show the original content until you override them.
URL structure is handled automatically. Webflow creates subdirectory-based URLs by default (e.g., /fr/blog/my-article) and adds hreflang tags to the page head. This is important for SEO because it tells search engines which version of a page to serve to which audience. Keep in mind that fully translating the URL slugs themselves requires the Advanced localization tier.
Asset localization is another powerful feature (locked behind the Advanced tier) that allows you to swap out images and videos depending on the visitor’s locale, which is great for regional marketing campaigns.
E-commerce localization lets you translate product names, descriptions, and metadata per locale while keeping pricing and inventory centralized.
Where the CMS bottleneck appears
The static page workflow is manageable even for larger sites because most sites have 10 to 50 static pages. You can translate those in a few focused sessions.
CMS content is where teams run into trouble.
Imagine you run a SaaS company blog with 300 articles. Each article has a Title, a Summary, a Body (rich text), an SEO Title, an SEO Description, and maybe an Author Bio field. That is 6 translatable text fields per item.
To translate 300 articles into French, you would need to open each item in the Editor, switch to the French locale, and manually translate 6 fields. That is 1,800 individual field translations done one at a time, inside a web-based editor that was designed for content management, not bulk translation.
There is no batch translate button. There is no “select all and send to translator” option. There is no CSV export built into the Localization tab.
For small CMS collections (under 20 items), this is fine. For anything larger, it becomes the bottleneck that holds up your entire international launch.
The CSV workaround that experienced teams use
The practical solution is to step outside the Webflow Editor for the translation step, then bring the content back in.
Here is the workflow:
Step 1: Export your CMS collection
Webflow allows you to export any CMS collection as a CSV file. Go to your CMS panel, select the collection, and click “Export.” The resulting file will contain every field as a column and every item as a row.
A typical blog export might look like this:
| Name | Slug | Summary | Body | SEO Title | SEO Description | Author | Featured Image |
|---|---|---|---|---|---|---|---|
| How we built our API | how-we-built-our-api | A deep dive into… | <rich text> | How we built our API | Learn about our… | Jane D. | image.webp |
The key insight: not every column needs translation. The Slug, Author, and Featured Image columns contain structural data that should stay exactly as-is. Only the text content fields need to be localized.
Step 2: Translate only the content columns
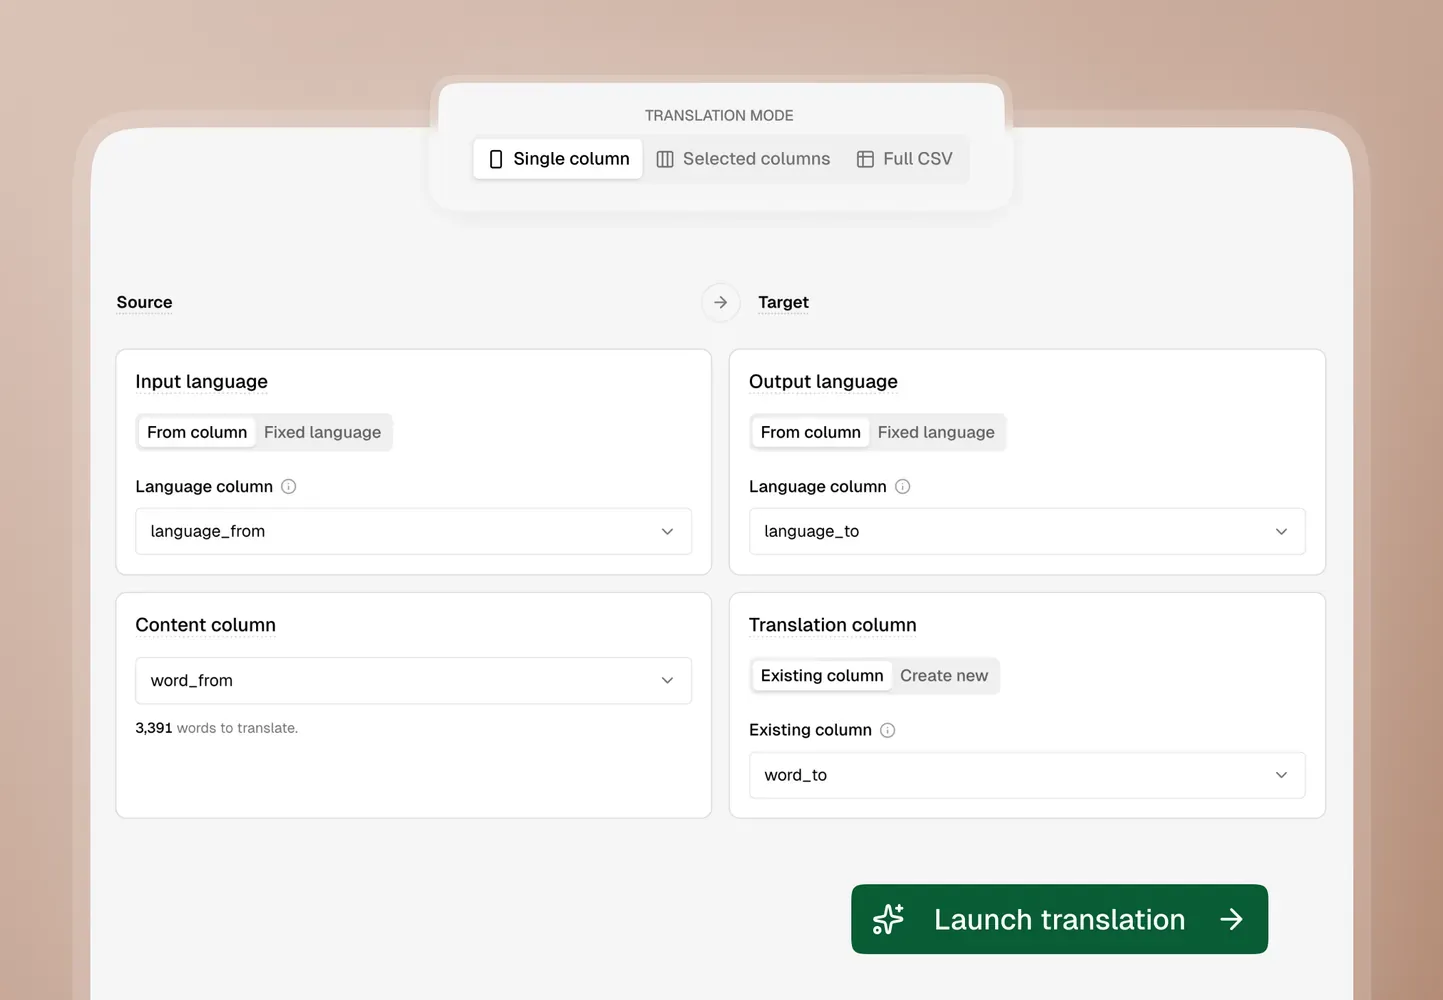
This is where a purpose-built CSV translation tool makes the difference. Instead of sending the entire file to a generic translator (who might accidentally translate your slugs or image filenames), you can use AI Glot’s selected columns mode to pick exactly which fields need translation.
For a typical Webflow CMS export, you would select:
Name(the article title)Summary(the excerpt)Body(the rich text content)SEO TitleSEO Description
And you would explicitly skip:
Slug(URL path, must stay in the original language for consistency)Author(proper noun, unchanged)Featured Image(file reference, not translatable)- Any
Category IDorCollection Referencefields
This approach has two benefits. First, it protects your data integrity because non-text fields physically cannot be modified. Second, it saves translation credits because you are only processing actual content, not structural metadata.
Step 3: Re-import into Webflow
Once you have the translated CSV, you import it back into Webflow using the CMS import tool. Webflow matches rows by their slug or item ID, so the translated content gets applied to the correct items.
One important note: as of now, Webflow’s native CSV import for localized content requires some manual mapping. Some teams use third-party tools or Webflow’s API to automate this step for larger collections. The translation itself, which is the most time-consuming part, is already handled.
When to use native localization vs. CSV translation
Both approaches have their place. Here is a practical decision framework:
| Scenario | Best approach |
|---|---|
| 5-20 static pages | Native Webflow Localization |
| Small CMS collection (under 30 items) | Native Webflow Localization |
| Large CMS collection (100+ items) | CSV export + AI Glot + re-import |
| Ongoing content production (weekly blog posts) | Native for new posts, CSV for backlog |
| Multiple target languages simultaneously | CSV export + AI Glot (do all languages in parallel) |
| Sites with strict glossary requirements | CSV + AI Glot glossary feature |
The honest answer is that most multilingual Webflow sites will use both approaches together. Native localization for the static pages and ongoing editorial work, and CSV-based bulk translation for the initial backlog and large collections.
A note on third-party alternatives
Before Webflow released native localization, third-party plugins were the standard way to add multilingual support. These tools work by intercepting your published site and serving translated versions through a proxy layer.
They are still valid options, especially for sites that need to go multilingual quickly without touching the CMS structure. But they come with their own trade-offs: ongoing subscription costs, potential SEO complications with proxy-based serving, and less control over the translation quality of individual fields.
AI Glot fits a different part of the workflow. Rather than replacing Webflow’s localization or competing with proxy-based plugins, it solves the bulk content translation step that both approaches struggle with. You can use it alongside either setup.
The bottom line
Webflow Localization is a solid foundation for multilingual sites, especially for static pages and small CMS collections. The URL structure, hreflang implementation, and Editor-based workflow are genuinely well designed.
But if your site has a large CMS collection, the one-by-one translation workflow will slow you down significantly. Exporting your CMS as CSV, translating the content columns with a structured tool like AI Glot, and re-importing the result is the fastest path to a fully localized Webflow site. Sign up to AI Glot and start your international launch.
For a detailed step-by-step walkthrough of the translation process itself, check out our guide on how to translate a Webflow CMS export with AI.

