
The Bottom Line: Translating a Shopify CSV is a precision operation where you must isolate the translatable content (Title, Body HTML) from the structural IDs (Handles, SKUs): by using Shopify CSV translation workflows for your product catalogs, you ensure a safe, structure-preserving localization.
This is the fastest technical path to localizing a Shopify product catalog without paying for expensive plugins or risking a broken import.
Shopify makes it easy to export your entire product database as a CSV. However, translating that CSV is a minefield. The file contains critical operational data: SKUs, image URLs, pricing, and handles: that will corrupt your store if accidentally altered during translation.
The objective of this guide is to show you how to securely extract the text content from a Shopify CSV, translate it using AI, and re-import it perfectly. Understanding why website translation is important for your conversion rate will help you justify the effort.
Prerequisites
Before starting, ensure you have:
- Admin access to your Shopify store with permission to Export/Import products.
- An AI Glot account (the free tier provides 7,000 total credits to start).
- A basic understanding of your target language for review purposes.
Step 1: Export your Shopify products
We start by getting the raw data out of Shopify.
- In your Shopify Admin, go to Products.
- Click Export at the top right.
- Select All products (or your current selection if doing a test batch).
- Choose CSV for Excel, Numbers, or other spreadsheet programs.
- Click Export products.
Shopify will email you a download link if the file is large, or download it immediately if it is small.
Technical Note: Do not open this file and resave it in Excel before translating if you can avoid it. Excel sometimes auto-formats large numbers (like barcodes) into scientific notation or alters UTF-8 encoding. Upload the raw CSV directly to the translation tool.
Step 2: Understand the Shopify CSV structure
A standard Shopify product CSV contains roughly 50 columns. To translate the catalog successfully, you must strictly divide these columns into “Translate” and “Do Not Touch.”
Columns to Translate (The Content):
TitleBody (HTML)(The AI will preserve the HTML tags and only translate the text inside them)SEO TitleSEO Description
Ensuring these fields are optimized by following multilingual SEO best practices will help you rank in your target markets.
Columns to STRICTLY Leave Untouched (The Structure):
Handle(This is the unique identifier linking the rows together. Do not translate.)VendorTags(Unless you are specifically localizing internal tags, leave them alone)Variant SKUVariant PriceImage Src- Any column starting with
Variant...
How Shopify handles variants in CSVs
Shopify structures variants across multiple rows. The first row for a product contains the Title and Body (HTML). If the product has a Red and a Blue variant, there will be two additional rows below it. In those variant rows, the Title and Body (HTML) cells are completely blank.
This is exactly why you cannot copy-paste this data into a chat tool. You must maintain these empty cells so Shopify knows which rows are variants of the parent product.
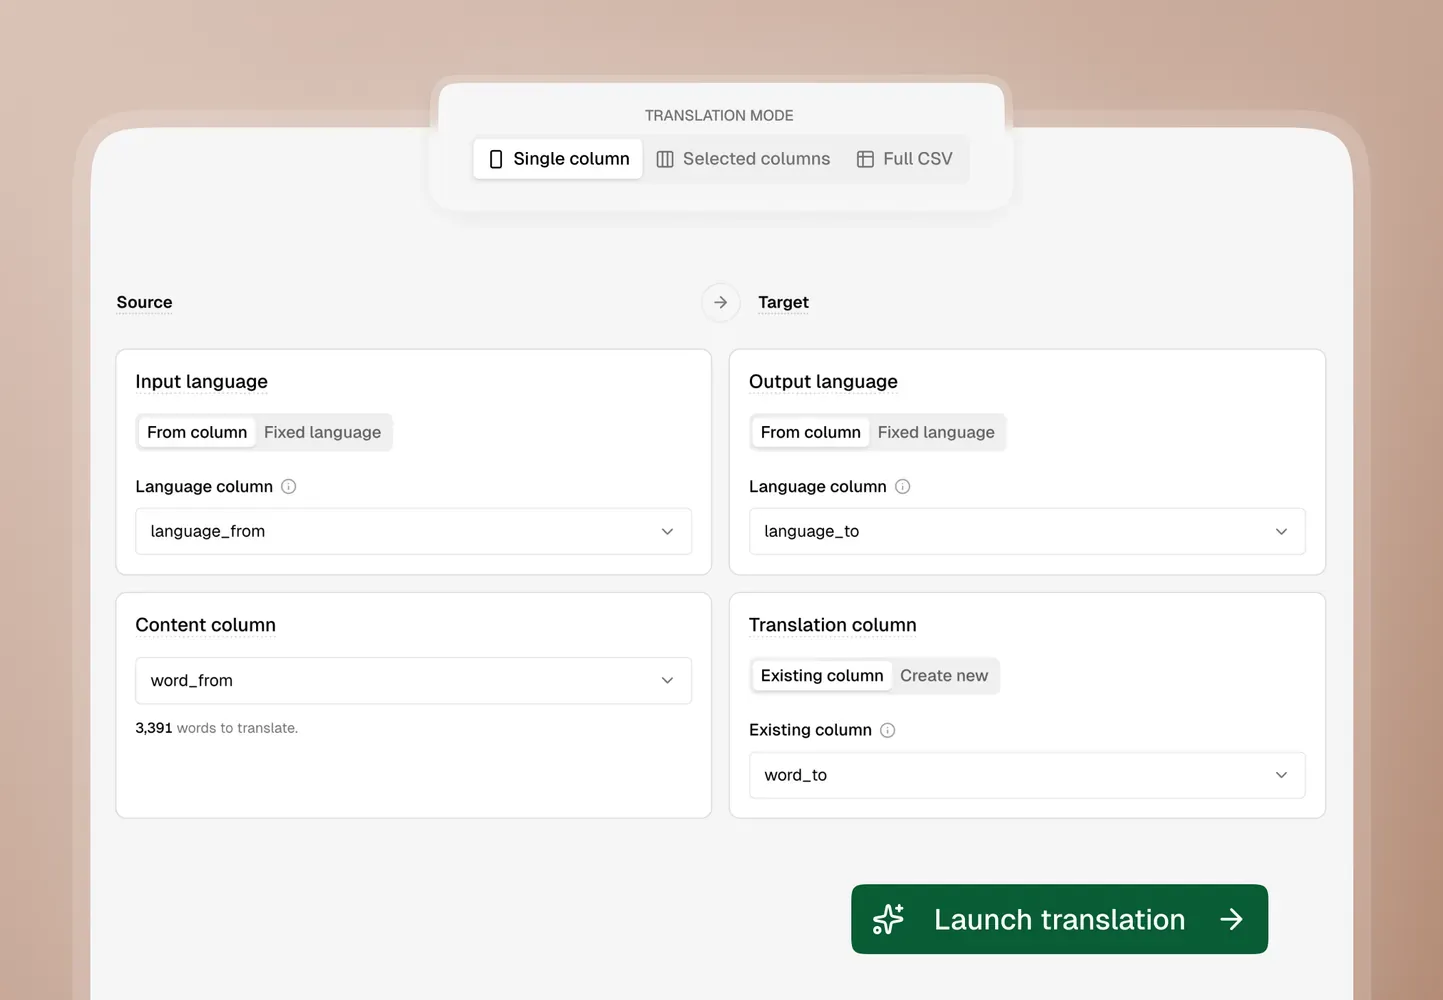
Step 3: Upload and map the columns
To process this file safely, we will use a structured translation platform.
- Log into AI Glot and upload your Shopify CSV. We have a full guide on how to translate CSV files with AI if you need more details on the interface.
- Select the source language and your target language.
- Select Selected Columns Mode. This is critical. It tells the engine to only look at specific fields and pass everything else through unchanged.
In the column mapping interface, configure it exactly like this:
Title➡️ TranslateBody (HTML)➡️ TranslateSEO Title➡️ Translate (if it contains data)SEO Description➡️ Translate (if it contains data)- Set every other column to Skip.
Step 4: Apply your brand glossary
Before translating, open the Glossary tab. Shopify stores rely heavily on consistent brand and technical terminology.
Add rules for:
- Your brand name (e.g., set “BrandCo” to remain “BrandCo”).
- Proprietary technologies or materials (e.g., “Gore-Tex” stays “Gore-Tex”).
- Specific product line names.
This ensures the AI does not attempt to literally translate a product name like “The Swift Runner” into target-language gibberish.
Step 5: Translate and Export
Review the cost estimate provided by AI Glot. It will calculate the word count based only on the columns you selected to translate.
Click Translate. The engine will process the HTML structure, apply your glossary terms, and generate a new CSV.
Once complete, download the localized CSV.
Step 6: Verification and Import
Before uploading the file back to Shopify, do a quick visual check. Ensure that the Handle column matches the original English handles. If the handles changed, Shopify will create entirely new products instead of updating the existing ones.
To import:
- Go back to Products in Shopify.
- Click Import.
- Upload your translated CSV.
- Important: Check the box that says “Overwrite any current products that have the same handle.” This tells Shopify to update the existing English products with your new translated data. (If you are using Shopify Markets for multi-language, refer to the specific import instructions for localized markets).
- Click Upload and continue, then review the preview.
- Click Import products.
How to know it worked
Navigate to one of your products in the Shopify Admin. The title and description should now reflect your target language, while your inventory counts, prices, and images remain perfectly intact.
By isolating the translatable text from the structural data, you have localized your catalog without compromising your store’s backend. Sign up to AI Glot and start scaling your global sales.

